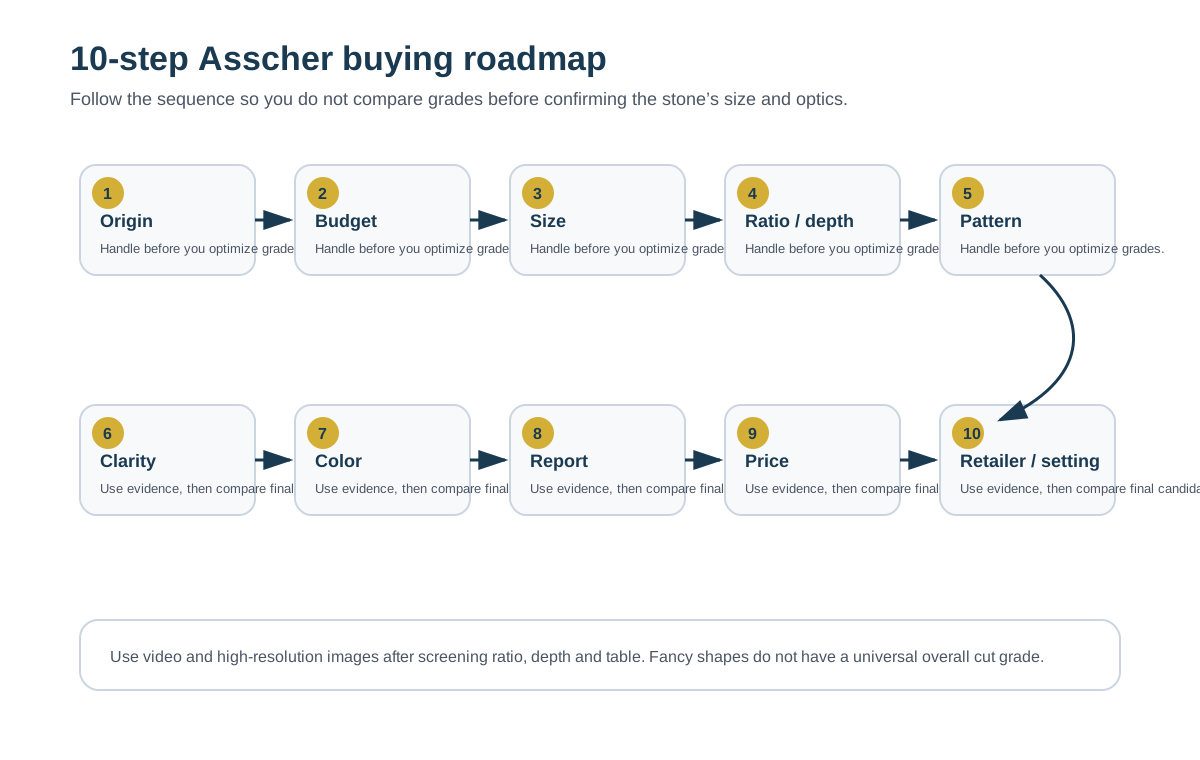
Your 10-step Asscher buying path
The order is intentional: do not spend time debating one clarity grade before you know whether the stone has acceptable spread and face-up pattern.
Why Asscher diamonds are harder to buy well
An Asscher is a step cut, not a brilliant cut. Its broad, parallel facets create flashes and a hall-of-mirrors effect rather than the dense sparkle pattern of a round brilliant. That makes the geometry easier to see—and weaknesses easier to see too. A stone can have acceptable color and clarity grades while still looking flat, excessively dark, watery, or poorly organized in video.
Inventory is also thinner than for round, oval, or emerald shapes. That means buyers often have fewer stones to compare within one exact carat/color/clarity combination. The practical implication is simple: do not shop by report filters alone. Use the report to narrow the field, then use high-resolution imagery or 360-degree video to judge the stone itself. Our Asscher selection guide explains the visual criteria in more detail.
1. Decide natural vs lab-grown before optimizing grades
Natural and lab-grown diamonds have the same crystal material and can both be graded by major laboratories. The choice is primarily about origin, price, rarity preference, and expectations around future resale—not whether one can look like an Asscher and the other cannot.
Natural Asscher
Best suited to buyers who value geological origin and the traditional natural-diamond market. Your budget will usually buy a smaller or lower-grade stone than the same spend in lab-grown.
Lab-grown Asscher
Best suited to buyers prioritizing visual size, higher color/clarity, or lower initial price. Price behavior and resale expectations can differ materially from natural diamonds.
See the dedicated lab-grown Asscher guide before comparing prices across the two categories. Mixing natural and lab-grown prices in one mental benchmark can make either category look artificially expensive or cheap.
2. Set a face-up size goal, not just a carat target
Carat is weight, not visible diameter. Asschers often retain more weight in depth than some other shapes, so two stones of equal carat can present differently from the top. A buyer who wants a certain visual presence should compare millimeter dimensions on the grading report, not merely the carat number.
This is especially important around psychologically popular weights such as 1.00, 1.50, and 2.00 carats, where prices can jump. A well-spread stone just below a threshold can sometimes present nearly as large as a heavier but deeper stone. Conversely, chasing low depth purely for spread can introduce visual problems. Size must remain subordinate to attractive light behavior.
3. Keep the outline square and use proportions as screening tools
A classic Asscher should read square to the eye. A length-to-width ratio around 1.00 is the starting point; small departures can still look square, while larger departures begin to resemble a short emerald cut. The report dimensions make this easy to calculate: divide length by width.
Depth and table percentages are useful for screening, but there is no single pair of numbers that guarantees a beautiful Asscher. Our current buying framework favors balanced proportions rather than extreme depth or table values. Use proportion ranges to eliminate obvious outliers, then inspect the pattern. The report is a filter, not a beauty certificate.
4. Judge the windmill, contrast, and windowing on video
This is the most important visual step. Rotate the stone slowly. A strong Asscher should show an organized sequence of bright and dark steps that change as the stone moves. Look for a centered, coherent windmill or X-shaped pattern rather than random darkness.
Reject stones with a persistent transparent or washed-out center, large dead areas that remain dark through rotation, or a pattern that looks noticeably lopsided. Some darkness is normal and necessary for contrast; the problem is darkness that dominates rather than alternating with bright steps. Similarly, seeing through parts of a step cut at particular angles is not automatically a defect, but an obvious central window in the normal viewing position is a warning sign.
For online shopping, high-quality 360-degree video is therefore more valuable than a large inventory with poor imagery. If a seller cannot provide a useful view of the actual stone, you are being asked to accept more uncertainty.
5. Buy enough clarity for the open facet structure
Step cuts reveal inclusions more readily than many brilliant cuts because the table is broad and the facets do less to camouflage internal features. That does not mean every buyer needs VVS clarity. It means inclusion type and placement matter.
VS2 can be an excellent value when the stone is genuinely eye-clean at normal viewing distance. VS1 provides additional safety if you prefer a cleaner report or are buying a larger stone where inclusions can be easier to notice. SI stones require more careful individual inspection. Avoid paying automatically for microscopic cleanliness you cannot see unless rarity or paper grade is part of your goal.
Use the grading plot and comments when available, but confirm the stone in magnified media. An inclusion under the table can matter more visually than a similar inclusion near a cropped corner.
6. Choose color in the context of size and setting
Asscher facets can make body color easier to notice than in a high-sparkle brilliant cut. For many buyers, G–H is a useful near-colorless target balancing appearance and price. Larger stones can reveal tint more readily, while yellow or rose-gold settings may make a slightly warmer diamond feel intentional rather than mismatched.
Do not pay for a D or E simply because it sits higher on the alphabet. Compare actual appearance and spend where the difference matters to you. If a stone will be set in white metal and you are very color-sensitive, moving higher may be worthwhile. If the setting is warm metal, a lower color grade may still look excellent.
7. Verify the grading report and the stone identity
Require an independent grading report from a recognized laboratory appropriate to the diamond category. Check that the report number, measurements, carat weight, color, clarity, and any inscription information correspond to the stone being sold. For lab-grown diamonds, verify that the report clearly identifies the diamond as laboratory-grown.
Also read report comments rather than stopping at the headline grades. Treatments, growth method notes, fluorescence, and plotting details may affect your evaluation even when they do not make the diamond unsuitable.
8. Judge price against a comparable stone—not a generic per-carat number
Price depends on carat, color, clarity, natural versus lab-grown origin, retailer margin, and the visual quality of the stone. The correct comparison set is therefore narrow: compare like with like. A 1.50-carat natural G/VS1 Asscher should not be benchmarked against a 1.50-carat lab-grown H/VS2 stone or a round brilliant simply because the carat matches.
Use our Asscher diamond price guide for directional budgeting. The page now distinguishes editorial planning ranges from reproducibly sampled market data; future updates can report collection dates and sample sizes rather than presenting false precision.
9. Choose a retailer that reduces uncertainty
For Asschers, the retailer's inspection tools and policies are part of the product. Prioritize sellers that show the actual diamond in useful magnification, make grading reports easy to inspect, provide clear return windows, and offer responsive support if you want another set of eyes on a stone.
A retailer with hundreds of listings but weak imagery may be less useful than one with fewer candidates and excellent video. Likewise, a slightly lower sticker price is not automatically a better deal if the return process is restrictive or setting service is unclear.
Our retailer comparison explains the factors we use and links to the retailer review methodology so the commercial recommendations are auditable rather than opaque.
Before you leave for a retailer
- Run the grading-report numbers through the Proportion Checker.
- Compare final stones with the Candidate Comparison Tool.
- Open the retailer comparison only after you know the origin, spread and quality floor you want.
10. Match the setting to the Asscher's geometry
The cropped corners make an Asscher less point-sensitive than shapes such as princess cuts, but the setting still needs to secure the stone correctly. Four-prong, bezel, halo, and geometric Art Deco-inspired settings can all work well. The best choice depends on whether you want maximum visible diamond area, additional edge protection, or a larger visual footprint.
Because Asschers have a strong geometric character, overly busy settings can compete with the step pattern. If the center stone is the priority, make sure the mounting lets you see the outline and does not overwhelm the windmill pattern. See Asscher ring styles for setting-specific considerations.
Final Asscher inspection checklist
- Origin: natural or lab-grown is clearly identified.
- Report: independent report matches the stone and listing.
- Outline: reads square to your eye; dimensions support that.
- Pattern: centered, organized windmill/step pattern in motion.
- No obvious window: center does not look persistently transparent or watery.
- Balanced contrast: dark zones change with rotation rather than remaining dead.
- Clarity: inclusions are acceptable at normal viewing distance.
- Color: appropriate for your sensitivity, stone size, and metal.
- Price: compared with truly similar stones, not just same-carat diamonds.
- Retailer: usable video, clear returns, report access, and support.
- Setting: secures the stone without hiding the geometry you are paying for.
Recommended reading path
How to judge Asscher quality
Use the report to screen, then use pattern and video to choose.
Certification & GIA
Read the grading report without expecting an Asscher cut grade.
Certification guide →Asscher size & dimensions
Carat is weight. Use millimeters and spread to understand what you will actually see.
Compare Asscher with other shapes
If Asscher is on your shortlist, compare it against the shapes that most often compete for the same buyer.
Buyer Decision Matrix
Combine budget, origin, size, clarity, color, setting and visual priorities.
Build your buying profile →Research & primary sources
See exactly which claims are laboratory facts, editorial screening frameworks, reference ranges or measured market observations.
Use the interactive Asscher tools
Move from reading to shortlist analysis with the Size Visualizer, Proportion Checker, Price Comparison Calculator, and Candidate Comparison Tool.